Wood Working
Troy's Wood Specialties Pictures


Wood Working |
|||
| I spent a week this summer working and learning the trade of cabinetmaking at Troy's Wood Specialties in Dell Rapids, SD. Below are some pictures with explanations of some of what I learned. There is also a link to the lesson plans that I created from the knowledge that I gained. | |||
|
Troy's Wood Specialties Pictures |
|||
|
Troy's has 4 table saws. Here are 3 of them that are continuously used to cut the lumber for the cabinets. The one in the back is set up for larger pieces (4'x8'), the one on the left-rear always has a dado blade, and the front one is used to cut the smaller pieces. There is also another table saw in the other room for use by everyone (mainly cutting drawer pieces). | ||
|
This is the plunger that is used to make face plates. An air hose is hooked up to the table to clamp the pieces down. This machine costs about $10,000, but is very useful. The same thing can be done in a smaller shop by using corner clamps. | ||
|
The face frames have just been put on these cabinets. They are glued on and then clamped and held for 45 minutes while the glue dries. The face frame is what makes the cabinet square. | ||
|
|
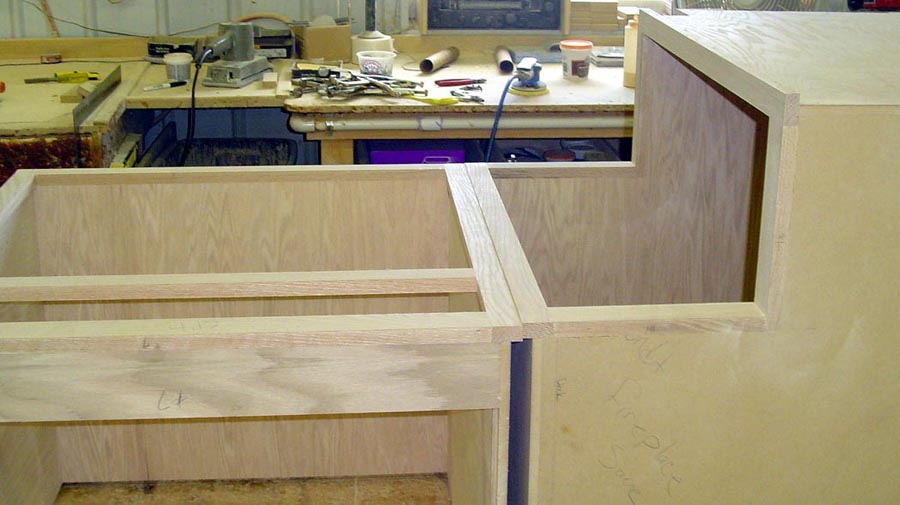
Here is a lazy-susan cabinet. The back (closest side) is cut at a 45 degree angle to make it easier to fit to the wall. Dado grooves are made in all the cabinets to make the pieces fit better and to make the cabinet stronger. | ||
|
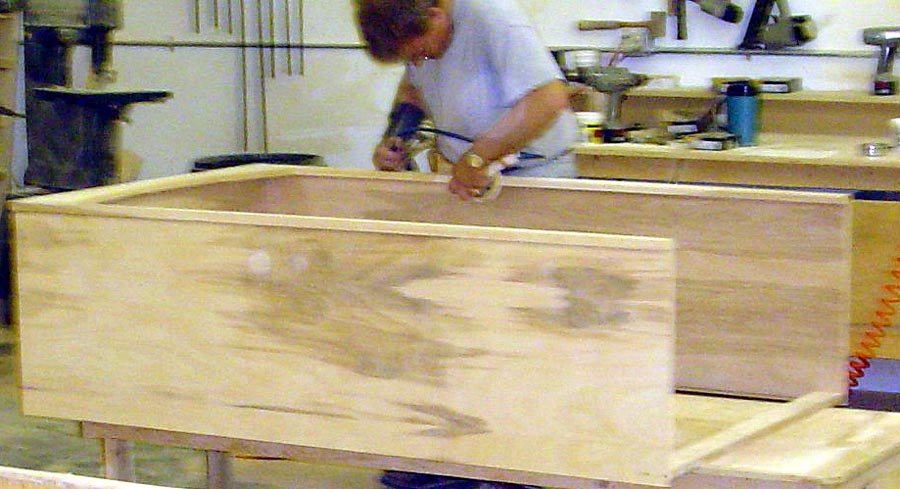
Dave is sanding this pantry so that it can be stained. He sands every piece as he puts on the face plates. This has to be done so that the marks don't show through the stain | ||
|
|
After the face plates are put on and the glue dries, cabinets that are put together in a kitchen are screwed together and sanded as one piece. The reason for doing this is so that they match up when they are put together. A pencil scribble is made before sanding w/ the belt sander so that you know when you have sanded far enough w/o making divots in the cabinet. This gets rid of the seam that is made when putting the cabinets together on the install. Obviously though, if they were together all the time they would be too difficult to handle. | ||
|
|
Casey has put these pieces together for sanding, demonstrating further what was stated in the previous picture above. | ||
|
|
Dan is using an air gun to seal this pantry. He used even spray and slightly overlaps the stream. One thing to always think about is where your overspray is going. You don't want it to spray onto something that has already dried because it will leave drops. The entire cabinet is sealed to protect against water damage, this is done before the lacquer is put on, but after any staining is done. | ||
|
|
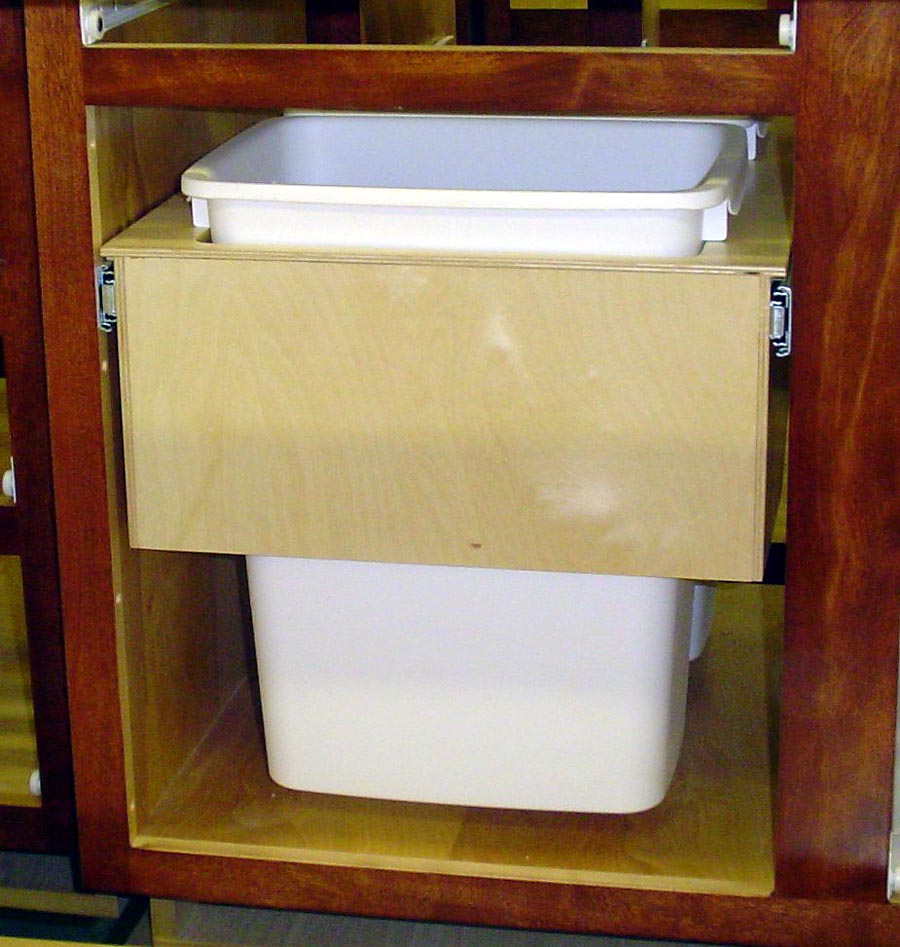
This garbage can slide is pretty neat. It is a drawer w/ 2 slots for 8 gallon garbage cans. I don't have a picture of the frame work that is used, but that is pretty unique as well. | ||
|
|
These are some cabinets that are finished. They have gone through the entire process (took about 2 days) and are drying so that they can be shipped out or installed. The doors are usually added during the install process. | ||
|
|
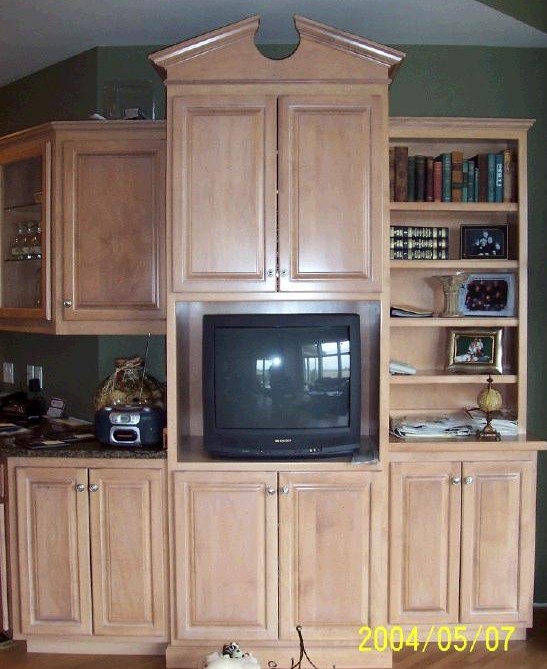
This is a finished (except for the door) corner cabinet. It is set up for a TV to set inside the upper compartment. Because it is in the corner, the TV can be seen from the entire room. Notice that the inside of the cabinet is finished only where it can be seen w/o opening a door. The face frame for this cabinet is cut square and then a router is used (w/ a jig) to make the top compartment larger and w/ a rounded look. | ||
|
|
|
||
|
|
|||
| Thank you Troy | |||
Troy's Wood Specialties